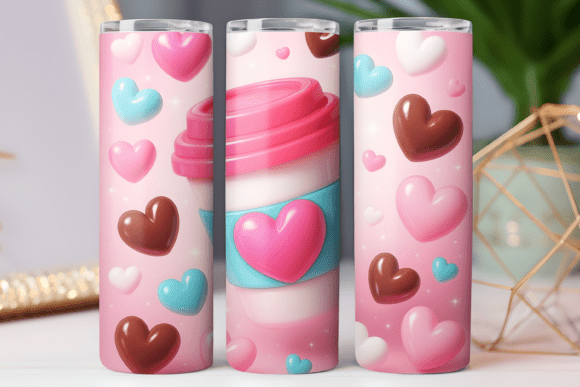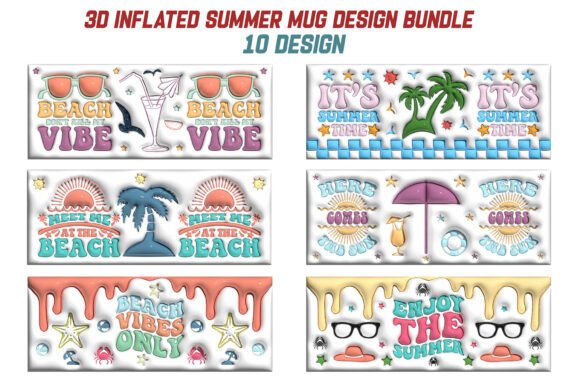
Mastering the 3D Inflated Summer Mug Design Bundle for Professional Sublimation Results
The visual appeal of summer-themed merchandise relies heavily on vibrancy, texture, and a sense of fun. The 3D Inflated Summer Mug Design Bundle taps directly into this aesthetic, offering creators a ready-to-use asset that mimics the trendy, puffy look of inflatable pool toys. For entrepreneurs, hobbyists, and professional designers, these quality clip art designs are perfect for a multitude of creative projects. However, possessing high-quality digital assets is only half the battle. The difference between a best-selling product and a returned item often lies in how these files are prepared, understood, and applied.
Many creators rush into printing without fully understanding the technical nuances of sublimation or digital design integration. This haste can lead to muted colors, pixelated edges, or designs that simply do not fit the physical product correctly. By addressing common misunderstandings early, you can ensure that your final output matches the professional standard expected by today’s consumers.
Understanding the Asset and Its Potential
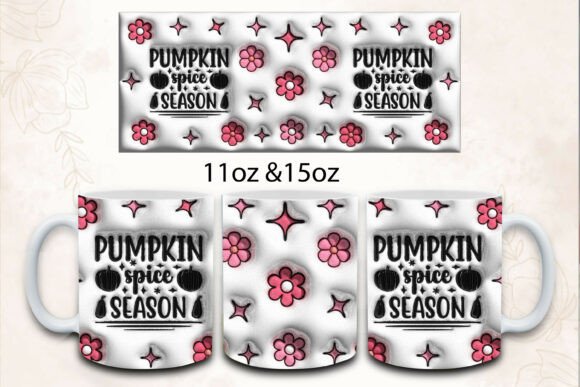
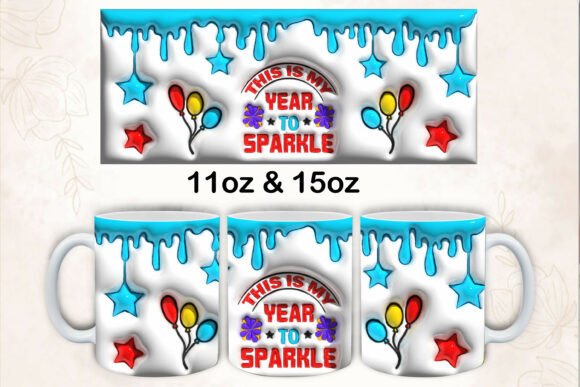
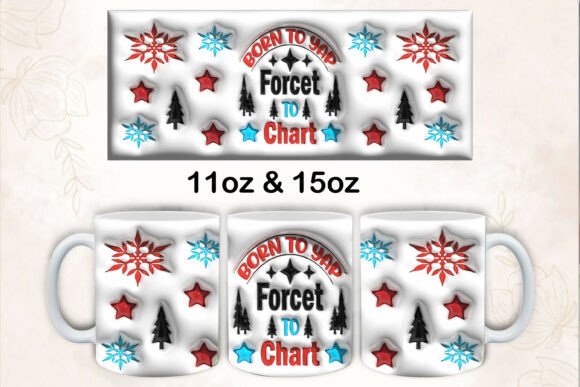
Before diving into production, it is essential to recognize what makes this bundle valuable. These are not flat, two-dimensional illustrations. They are engineered to look three-dimensional, adding depth and tactile interest to otherwise smooth surfaces. This specific collection is optimized for an 11oz mug, with dimensions set at 9x3.5 inches (2700px x 1050px) at 300 DPI. This resolution is critical. It ensures that when the image is transferred to ceramic, the edges remain crisp, and the gradient transitions in the "inflated" effect appear smooth rather than banded.
The versatility of these files extends beyond mugs. While the primary specification targets drinkware, the high-resolution PNG format allows for adaptation across various mediums. You can utilize these graphics for sublimation products like t-shirts, pillows, and bags, or incorporate them into digital projects such as cards, frame artwork, scrapbooks, and stickers. The key is recognizing that while the source file is static, its application is dynamic. A design that looks stunning on a white ceramic mug may require color adjustment or background removal when applied to a dark fabric tote bag.
Common Pitfalls in File Preparation and Usage
One of the most frequent mistakes beginners make involves file handling. You will need a computer to unzip these files and a design editing program that supports JPG and PNG file formats to use them effectively. Attempting to view or edit these high-resolution files on mobile devices or using basic image viewers often results in compression artifacts or an inability to access layers if any are present. Furthermore, ignoring the need for proper software can limit your ability to adjust the design to fit specific print areas.
Another significant oversight is neglecting monitor calibration. Actual colors may vary slightly due to monitor settings. If your screen is set to a cool, blue-heavy temperature, the sunny yellows and vibrant oranges in the summer bundle may appear duller or shifted on your end. When you print based on this inaccurate perception, the final product may look washed out or overly saturated compared to your digital proof. Depending on how you choose to print out the image, colors and quality may vary significantly. Sublimation ink behaves differently than standard inkjet ink, often appearing darker once heat-pressed. Failing to account for this shift can result in products that look muddy rather than bright and airy.
The Importance of Dimensions and Aspect Ratio
The provided dimensions—2700px by 1050px—are specific to the wrap-around nature of an 11oz mug. A common error is stretching or squashing the image to fit a different aspect ratio, which distorts the 3D inflated effect. The shadows and highlights that create the illusion of volume will look unnatural if the proportions are altered. Instead of forcing the fit, smart creators adjust their canvas size to match the asset or carefully crop non-essential elements while maintaining the integrity of the central design.
Strategic Application for Better Results
To avoid these pitfalls, adopt a workflow that prioritizes verification and testing. Start by ensuring your design software is up to date and capable of handling large PNG files without lag. Programs like Adobe Photoshop, Illustrator, or even robust free alternatives like GIMP or Canva Pro can handle these formats, but each has its own color management settings. Take the time to learn how your specific software handles color profiles, particularly sRGB, which is standard for web and most digital prints.
When preparing for sublimation, always perform a test print. Print a small section of the design on sublimation paper and press it onto a spare mug or a piece of sublimation-ready fabric. This step allows you to see how the colors translate from screen to physical object. If the blues look purple or the whites look gray, you can adjust the brightness and contrast in your editing program before committing to a full production run. This small investment of time saves money on wasted materials and protects your brand reputation.
- Check Resolution: Ensure your final canvas is set to 300 DPI to prevent pixelation.
- Verify Color Profiles: Calibrate your monitor or use a known reference image to gauge color accuracy.
- Respect Aspect Ratios: Do not stretch the 3D elements; maintain the original proportions for realistic depth.
- Test Print: Always run a small test to check ink saturation and heat press settings.
Expanding Beyond the Mug
While the bundle is labeled for mugs, creative entrepreneurs know that limiting assets to a single product type leaves money on the table. Consider how the inflatable summer theme translates to other items. For example, the same vibrant, puffy graphics can be scaled down for sticker packs, where the high DPI ensures clean cuts and sharp details. For apparel, such as t-shirts, you may need to isolate specific elements of the design using a background removal tool, as sublimating on dark fabrics requires a white underbase or a different printing method entirely.
For digital products like e-cards or social media graphics, the PNG format with transparency (if available in the specific file variant) allows for seamless layering over photos or textured backgrounds. This adaptability increases the value of the purchase, allowing you to create a cohesive summer campaign across multiple platforms and products. However, remember that screen display differs from print. Colors that pop on a glossy mug may appear flatter on a matte phone screen, so slight adjustments may be needed for digital-only uses.
Making Informed Decisions Before You Buy
Before integrating the 3D Inflated Summer Mug Design Bundle into your workflow, assess your current capabilities. Do you have the necessary hardware to unzip and process large files? Is your printing setup calibrated for accurate color reproduction? Are you familiar with the limitations of your chosen substrate? Answering these questions honestly helps prevent frustration later. If you are new to sublimation, start with a small batch. Use the bundle to learn how heat and time affect the final image. Document your settings for successful prints so you can replicate them consistently.
Ultimately, success with digital design assets comes from respecting the technical requirements while leveraging creative freedom. By avoiding common mistakes like improper scaling, ignoring color variance, and skipping test prints, you ensure that your final products are not just adequate, but exceptional. This attention to detail builds trust with your customers and establishes your brand as a provider of high-quality, professionally crafted goods. Whether you are creating for fun or for profit, treating these digital files with care yields the best possible return on your creative investment.